Posted to News on 25th Apr 2024, 14:00
How to develop an LED UV curing process
Device manufacturers bonding medical plastics can benefit from the process speed and control offered by UV curing adhesives. To build an accurate and repeatable new process, all process variables need to be understood, so they can be eliminated or kept within acceptable tolerances. Here Peter Swanson, Managing Director of Intertronics, explains how manufacturers can achieve a reliable and repeatable UV curing adhesive process.

In a UV curing adhesive process, the two key areas of focus are making sure the adhesive has fully cured, and that it has been applied in the correct quantity and location. For both areas, medical device manufacturers can identify the process variables, and either eliminate them or keep them within acceptable tolerances. This must be done using actual production parts, including the specified substrates, adhesive, and manufacturing tolerances.
The adhesive data sheet will guide the manufacturer on an appropriate curing lamp, which could be a mercury arc or LED-based technology (of a specified wavelength, such as 365 nm). Once a lamp type and wavelength has been specified, it should not be changed without requalification.
Some adhesive data sheets will give guidance on curing intensity and time, but these parameters need to be established for your parts experimentally. "Intensity" means the irradiance/radiant power arriving at the surface per unit area in W/cm2 or mW/cm2.
For the adhesive to cure completely, it is important to ensure that it receives the correct "dose" of UV curing energy. The "dose" means the total energy arriving at the surface per unit area - the intensity of the light combined with the time duration of exposure. "Dose" is measured scientifically in J/cm2 and equals W/cm2 x seconds (intensity x time).
Every application is different. Factors like the substrate, bondline topography, and differing light transmission characteristics impact the amount of UV energy getting into the bondline, which makes it essential to establish the dose for an optimum cure using practical tests on production parts.
Full cure is the point at which additional cure time/intensity no longer improves the physical performance of the cured material. Medical device manufacturers can choose a measurable parameter to determine the amount of cure (for example bond strength, adhesive hardness). Additionally, some materials offer features that visibly demonstrate when cure is complete, such as Dymax See-Cure colour change technology.
You will need to specify a UV curing lamp with enough intensity to generate a full cure in the time you have available (and certainly more than a recommended minimum of 50mW/cm2). Higher production speeds will require higher cure intensity to achieve throughput, although in general terms, it is better to have a higher intensity which allows shorter cure times.
Process development can be looked at in two ways: setting the exposure time and varying UV light intensity, or setting the intensity and varying the exposure time. Either way, it is important to understand and validate these two inter-related variables, time and intensity, early.
Distance from the lamp to the bondline is an influential variable - as a general rule, curing intensity decreases with distance under an inverse square law. Once an appropriate distance is determined, the distance should be fixed.
Note that the intensity of a mercury-arc lamp decreases over time, and must therefore be monitored using a radiometer. Once the intensity is too low for optimal cure, an engineer can replace the bulb. LED lamps, on the other hand, do not lose their curing power over time in a way that would substantially influence the curing process.
Intensity mapping helps assess the consistency of light intensity over the illuminated area to build a better understanding of the lamp's behaviour. To ensure full cure, the manufacturer may have to define intensity based on the lower power areas of the light source.
Know your limits
A safety factor helps build a robust process that is capable of withstanding unavoidable variation. It is added to the minimum intensity, creating a minimum intensity limit. For example, if the minimum intensity for full cure in 5 seconds is determined to be 75 mW/cm2, a safety factor of 50% would make the minimum intensity limit 113 mW/cm2. While we would typically recommend a 25% safety factor, it is highly application dependent, and we recommend consulting an expert.
Defining the upper intensity limit will avoid the risks associated with too much UV light energy, such as damage to the substrate. Medical device manufacturers can conduct tests on their parts to understand the highest intensity that still produces acceptable parts.
Checking the intensity
Once the limits are defined, it is important to develop a process that stays within them. To assess the health of the system and ensure it is within the process testing limits, manufacturers can check and document the output intensity of their curing lamps. As above, the intensity of mercury arc broad spectrum lamps decreases over time, and should be checked regularly. The degradation curve is somewhat predictable, but will be influenced by operating factors like how often the lamp is turned on and off.
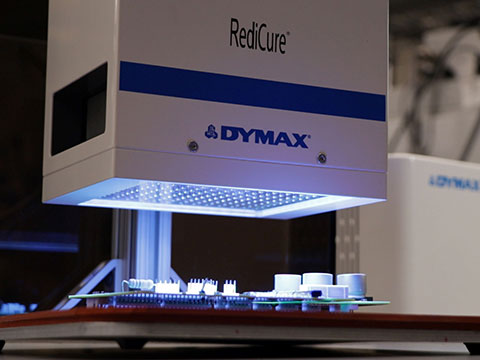
Mercury arc lamps have a warm-up and cool down period, typically taking up to 5 minutes to reach full intensity. In many cases, we recommend that mercury arc lamps are left on all day to avoid variation and save time. LED UV lamps, however, are instant on/off and have no warm-up or cool down time. LED UV lamps have minimal intensity degradation over time, and introduce less process variability, so are a good choice if they are a viable option to cure the specified adhesive.
Medical device manufacturers can check whether the lamp is above the minimum intensity limit with a radiometer, by using a calibrated device from the same manufacturer and fixed using a fixture or jig to aid consistency. Some customers perform the intensity check using calibrated radiometers at the start of every shift, for example.
If the lamp is below acceptable limits, the engineer can adjust the intensity or change the bulb (if a mercury-arc system). Documenting the serial number of the radiometer, when it was last calibrated, the exposure time, distance from the part, and any other identified process variables, will help to ensure consistency and evidence the process was carried out as specified.
It is also important to clean reflectors and the ends of light guides, to remove any dust or contamination. Scheduled checks of the transmission of the light guide can be helpful to identify if any degradation has occurred over time.
Ensuring the correct deposition of adhesive
Dispensing UV curing adhesives is relatively straightforward, especially as they are single part materials. Process qualification requires the manufacturer to establish the minimum and maximum quantities of adhesive needed for the desired bond strength. Based on this, the choice of application technology can vary from simple time/pressure dispensing controllers with lower accuracy, up to volumetric dispensing equipment that can dispense small quantities with an accuracy of +/-1%, better than 99% of the time.
Once the manufacturer has identified a good methodology to test, repeatability and accuracy can be checked against the tolerances. Once installed, the dispensing equipment should be maintained to a schedule, with dispensing needles replaced regularly.
Adhesive placement can be checked for accuracy and repeatability. It is important to understand the flow or wicking tendency of the adhesive, and ensure the bondline is void-free. Applications with narrow tolerances may benefit from a dispensing robot or other automation tool, to keep to the qualified process.
The more variation that can be eliminated, the better. Adhesives applications are complex, and so the best approach is to work with an adhesives partner who understands all the details of the process.


